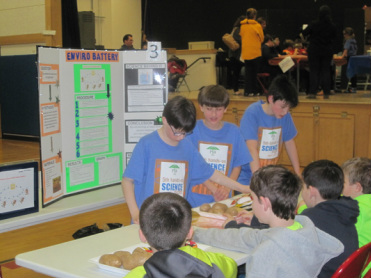
"Enviro" Power
Question: Can potatoes be used to turn on a light bulb?
Hypothesis: Potato juice contains many water soluble chemicals that may cause a chemical reaction with one or both of our electrodes. So we should get enough electricity to light a small LED light.
Our Experiment
Materials: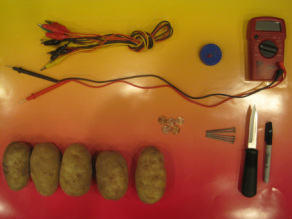
Potato Battery Requirements:
|
Safety ProceduresThis experiment does not create any hazardous conditions. You are working with very low voltage which cannot cause any harm to your body. Please make sure that you do not put small and sharp objects into your mouth and be careful with the knife, as you slit the potato to insert the copper coin.
|
Procedure:Step
1
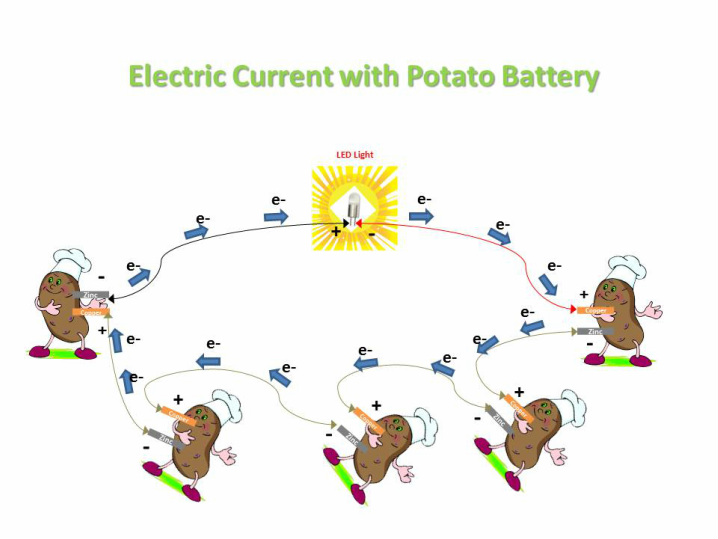
Take the first potato and make a slit at one end. Insert the copper coin into the slit and with the black marker put a "+" sign on the potato to help you later setting up the connections. Make sure the potato is fresh because the phosphoric acid in the potato acts as the electrolyte. If there isn't enough juice, your battery won't work. In addition, your copper coin must be clean. Step 2 At the other end, insert the galvanized zinc nail and with the black marker put a "-" sign on the potato. Ensure that the nail and coin do not touch each other. Note: The coin and nail form the positive and negative electrodes creating a single cell battery. The two oppositely charged electrodes will now permit the flow of electrons through them. The free electrons from the potato juice will travel from the negative electrode (nail) to the positive electrode (coin). Step 3 Connect the two electrodes using an alligator clip wire. Electricity will flow from the nail to the coin, via the potato juice electrolyte. Note: The rate at which the electrons flow is called voltage. The faster the electrons flow, the higher the voltage. The voltmeter will measure the rate of electron flow. If one connects the voltmeter to the electrodes, a voltage of 0.5 volts will be detected. However, this is not enough to light a bulb. Step 4 To achieve enough voltage to light the bulb, make more potato batteries and connect them via the alligator clip wires. Take the other four potatoes and follow the same procedure from step 1 to step 3. Your four individual potato batteries are ready, which if combined will give a total voltage of 3.50 volts. This is enough to light up a small LED light. Step 5 Connect the five potato batteries to each other with alligator clip wires, such that the "+" electrode of one battery is connected to the "-" terminal of the other battery. Have a look at the image above for clarity. Step 6 Connect the negative terminal of the first potato to the LED and the positive terminal of the fifth potato to the LED. Your circuit is complete. The flow of electrons will take place from potato 1 to 5, via 2, 3 and 4 and then light up the LED. Note: LEDs work at even very low voltages (below 2V) and low currents. These LEDs get damaged if connected to batteries over 2 volts. Thus, they require resistors to control batteries which are rated over 2V. However, since potato batteries produce low current, it is safe to connect an LED to it. Special Needs: No special requirements |
Watch us in action:
|
The Science behind it
Definitions
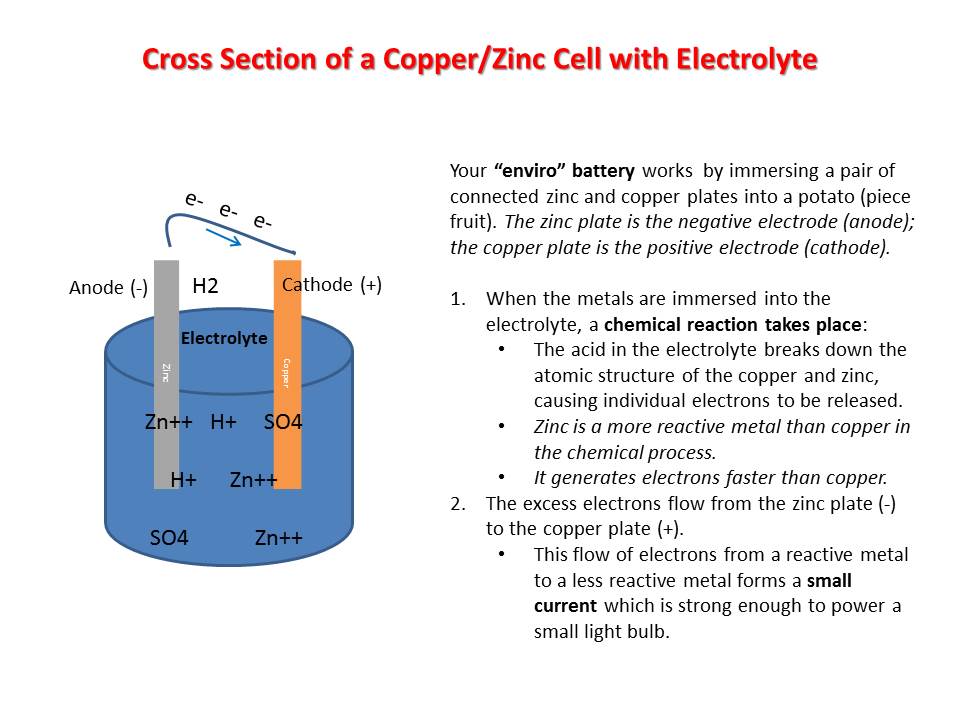
•Electrodes:
–Cathode (+): one of the metal part of the battery (copper) creating the positive terminal
–Anode (-): the other metal part of the battery (zinc) creating the negative terminal
•Electrolyte: Acidic solution in the battery (potato juice = phosphoric acid)
•Electrons: Individual atomic structures as a result of a chemical reaction (electrolyte breaks down the atomic structure of the positive and negative electrodes)
•Electricity: Flow of individual electrons •Voltage: Measure of force of the moving electrons
Results
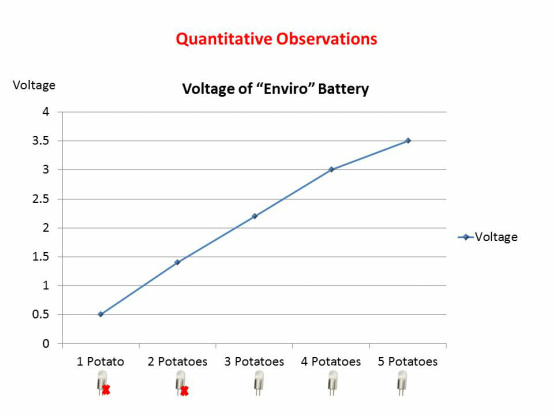
As we increased the number of potatoes in the electric circuit, the voltage gradually increased. With one potato we had 0.5V, with two potatoes the voltage increased to 1.4V, at 3 potatoes the voltage was 2.2V and the LED light bulb got lit up. As we connected more potatoes, the power of the light increased. The voltage at 4 potatoes was 3.0V and at five potatoes we reached 3.5V, which is equivalent of two AA or AAA batteries.
We have also connected 5 lemons, but we were not able to light up the light bulb.
We have also connected 5 lemons, but we were not able to light up the light bulb.
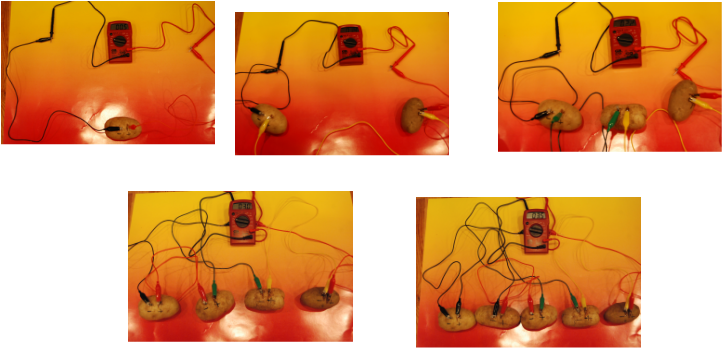
"Enviro" Battery with 1 to 5 potatoes and a Voltmeter
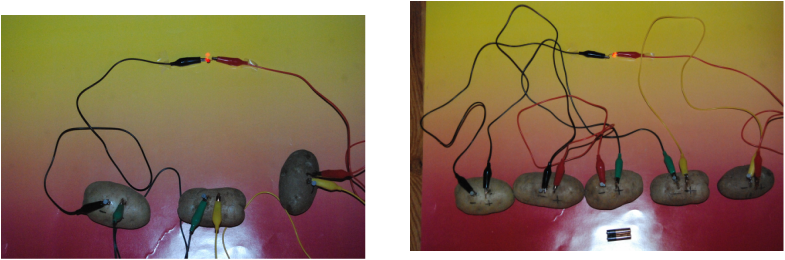
"Enviro" Battery with LED light
Conclusions
Creating electricity and making a battery is easy, the main challenge is producing a battery that can continue to produce larger amount of electricity for larger amount of time. By connecting multiple potato batteries, you can make enough electricity to light up a small LED bulb.
References
http://web.archive.org/web/20090321190314/http://www.unit5.org/christjs/Potato%20Battery.htm
Lisinska, G.; Leszczynski, W. (1989). Potato Science and Technology. Springer. p. 286. ISBN 9781851663071
http://miniscience.com/projects/PotatoElectricity/
http://www.scienceprojectlab.com/potatoBattery.html
Meet JamesHi, I am James. I love fishing, building forts, exploring new things, kayaking, football, and playing outside. I also enjoy reading. My favorite book series is Harry Potter.
|
Meet AndreHi, I am Andre. I like to read. My favorite book is Hatchet. I also love to ride my bike, sled and play outside. I swim with the Marlins in Mt Kisco and fence at PCFC.
|
Meet Patrick
Hi, I am Patrick. I enjoy fishing, reading, and playing outside. My favorite sport is skiing. I have fun getting together with friends and playing Mine-craft.
|